Showing posts with label #sewing. Show all posts

Saturday, 29 April 2017

Vogue 8682 (V8682)

I've decided that it's really hard to concentrate at work when it is a Monday, and that Monday is the day before a public holiday.

My mind is on sewing projects and not on work.

In a previous post I mentioned that I was overcome by my sewing stash, I went around the house telling my husband, "Hi, I'm Sandra, and I have a fabric problem".  Now to tackle some of that problem.

I pulled out some patterns to, that I always had the intention of sewing, but never did.  The first one to get off that table of mine is Vogue 8682.  I then went through my stash and found four metres of red peach skin fabric.  (Now, are you having flashbacks to the 1990s?)  That's exactly how long I've had this piece, it was quite vogue back then, I love it's texture, it's probably the closest you get to a fake suede, but in a fabric form.  It will do nicely when the days become cooler (at present I've the fan on in our office and wearing a summer dress!)  OK, I'm not working either, when I should be.


Pattern:  V8682

What adjustments did I do to this pattern?

  • 3cm (1") adjustment to extend the length at the waist
  • I chose the short length with the long sleeves (long sleeves with longer length reminded me of a nightie).
The pattern called for a 22" zip, I had a 18" one on hand and finally decided to go with this because the fabric itself has some stretch.

I am very happy with the outcome.  It is comfortable and and easy pattern to put together.

Those quick projects that add to our wardrobe are just the best.

Items used from stash today:  reel of cotton and overlocking thread; four metres of fabric; one zip.

Happy sewing everyone.

Sandra


Sunday, 23 April 2017

Patchwork - Buzz Saw Design

I had one of those Tim Gunn, 'make it work' moments again when attempting this design, plus I was limited in the amount of owl fabric I had.

The first block worked out well, it all went astray after that one block.  I got discouraged, and resigned myself to the fact that it may have to be thrown out along with the attempt of the next block.

I put it away, made three tops and two other quilt tops and got back to it.  I squared up the block (it was more of a rectangle beforehand) and finished it off to make another baby quilt top.


It needs a press, but I did make do with what fabric I had on hand.

The instructions I used (I am not going to name and shame) were partially to blame for what went wrong with this quilt top.  However, in the end I am happy with the end result.

What I find with sewing is, that most of the time things go along well, however, sometimes some curvers come our way.  We have two choices at this stage; throw it out and start again or try and problem solve the problem.  It is much more satisfying when we problem solve and come out with a satisfactory result.

How has your sewing been progressing?

Happy sewing.

Sandra

PS Some other leftover 'mistakes' did make it into the bin!

Tuesday, 10 January 2017

My Coverstitch machine adventure - underwear - pants

I don't know if you recall my post last year to do with my anguish over sewing with stretch fabric.  As a result of my inability to be satisfied with the finish of a garment using stretch fabric on a regular sewing machine, I toyed with the idea of purchasing a cover stitch machine.

I actually agonised for quite a long time.  At first I thought that I should buy a very cheap Semco machine from Spotlight.  At $220 it was affordable; but, it's reviews were mainly mixed and negative. Then there's the issue of servicing, a service would cost at least $100 and the internal parts on this machine are plastic. I did layby it, and then cancelled it and investigated further.

What I didn't want was a machine that was both an overlocker (serger) and cover stitch machine. Inevitably one component of this dual system will break down and would be without a machine whilst serving.

I read reviews like this one What is the Best Coverstitch and many other articles. I discussed this with my husband, firstly, we decided that I should get the machine in the brand I wanted.  One that could be easily serviced, a brand that was reputable and easy to get parts for.  So that eliminated the Semco cheap machine.  Besides, I don't think I would ever be happy if I didn't get a reliable machine. Secondly, I anguished over whether it was worth spending money on a machine that it's main purpose was to finish stretch fabric, you know, the fabric I always avoid using because I can't get a professional finish.  Have you noticed that when sewing patterns have been released that increasingly they require you to use stretch fabric?  I have, and decided that I was just hiding my head in a bucket of sand if I really thought that I could avoid this fabric for the rest of my life!

I looked some more, investigated and researched, um and ah'd and then finally bit the bullet at the beginning of December and put a Janome Coverpro 2000CPX  on layby (I felt that if I did change my mind I could still back out of it whilst it was on layby).

Finally the urge, excitement and possibilities of this machine got the better of me, so I picked it up last week.

So, I also said last year that I would like to make underwear.  Using some left over stretch fabric I made my first pair of underpants.  There is no going back, I am in love with my new machine and the possibilities of what I can now make have opened a pandora's box of possibilities!


Happy sewing everyone

Sandra


Tuesday, 3 January 2017

Happy New Year

Hello everyone

I hope that you had a Merry Christmas and Happy new year to all of you.

I'm on a mission at the moment, three babies are due at work this year, and since I am on holidays wanted to get these out of the way, so I wanted to get the quilt tops out of the way first.

I have completed three quilt tops this week, both using the strip piecing technique.  One will be familiar to you (I have blogged about this before) the other was a technique that I found on Pinterest 

Now, being a bit of a perfectionist the technique here actually produced two quilt tops for me.  I could have incorporated it into one quilt.  The printed fabric in this quilt is vintage.  It's not cotton. Herein lies my contradictions, because I'm not a purist when it comes to quilting (a purist would use 100% cotton all the way through).  The vintage fabric is from my mother in law, who also was a sewer. When she departed I went through her stuff and kept most of the vintage fabric.  How could I not use it?  It gives it such an Art Deco feel.


Here is the other, a familiar quilt top to me now.


Better go and pick up my new toy, more later.....

Happy sewing everyone.

Sandra

Thursday, 29 December 2016

Pouch

It's a balmy night inside the house tonight and my fingers just seem to be sticking to the keyboard tonight.

A few weeks ago I really didn't think that I'd be able to achieve my goal of 52 blog posts for the year. However, here I am with my 52nd blog!  Fanfare music playing here!

I had purchased as a gift for a friend a quick unpick.  Odd gift, but this is very special.  I had originally purchased one for myself from Alan's Pen Making after rave reviews from other sewers on a group site I suscribe to on Facebook.  It's made from wood.  So pretty, and every sewer should have special tools to work with.

Here's the one I purchased for a friend:


I decided to make some sort of bag for it to go into.  I downloaded a pattern off the internet from Flamingo Toes called the Spring Zipper Pouch Pattern.  It is very simple to make.  I used a vintage fabric I'd previously used on some aprons I had made:


Well that makes 52.  Sewing goals for next year?

I will aim to:

* make and blog about 52 of my creations
* choose three mediums in sewing that I have not worked with, first cab off the rank will be leather

Happy new year everyone, it would be good if you could just leave me a short message about yourself and what you enjoy sewing.

Stay safe.

Happy sewing.

Sandra


Tuesday, 20 December 2016

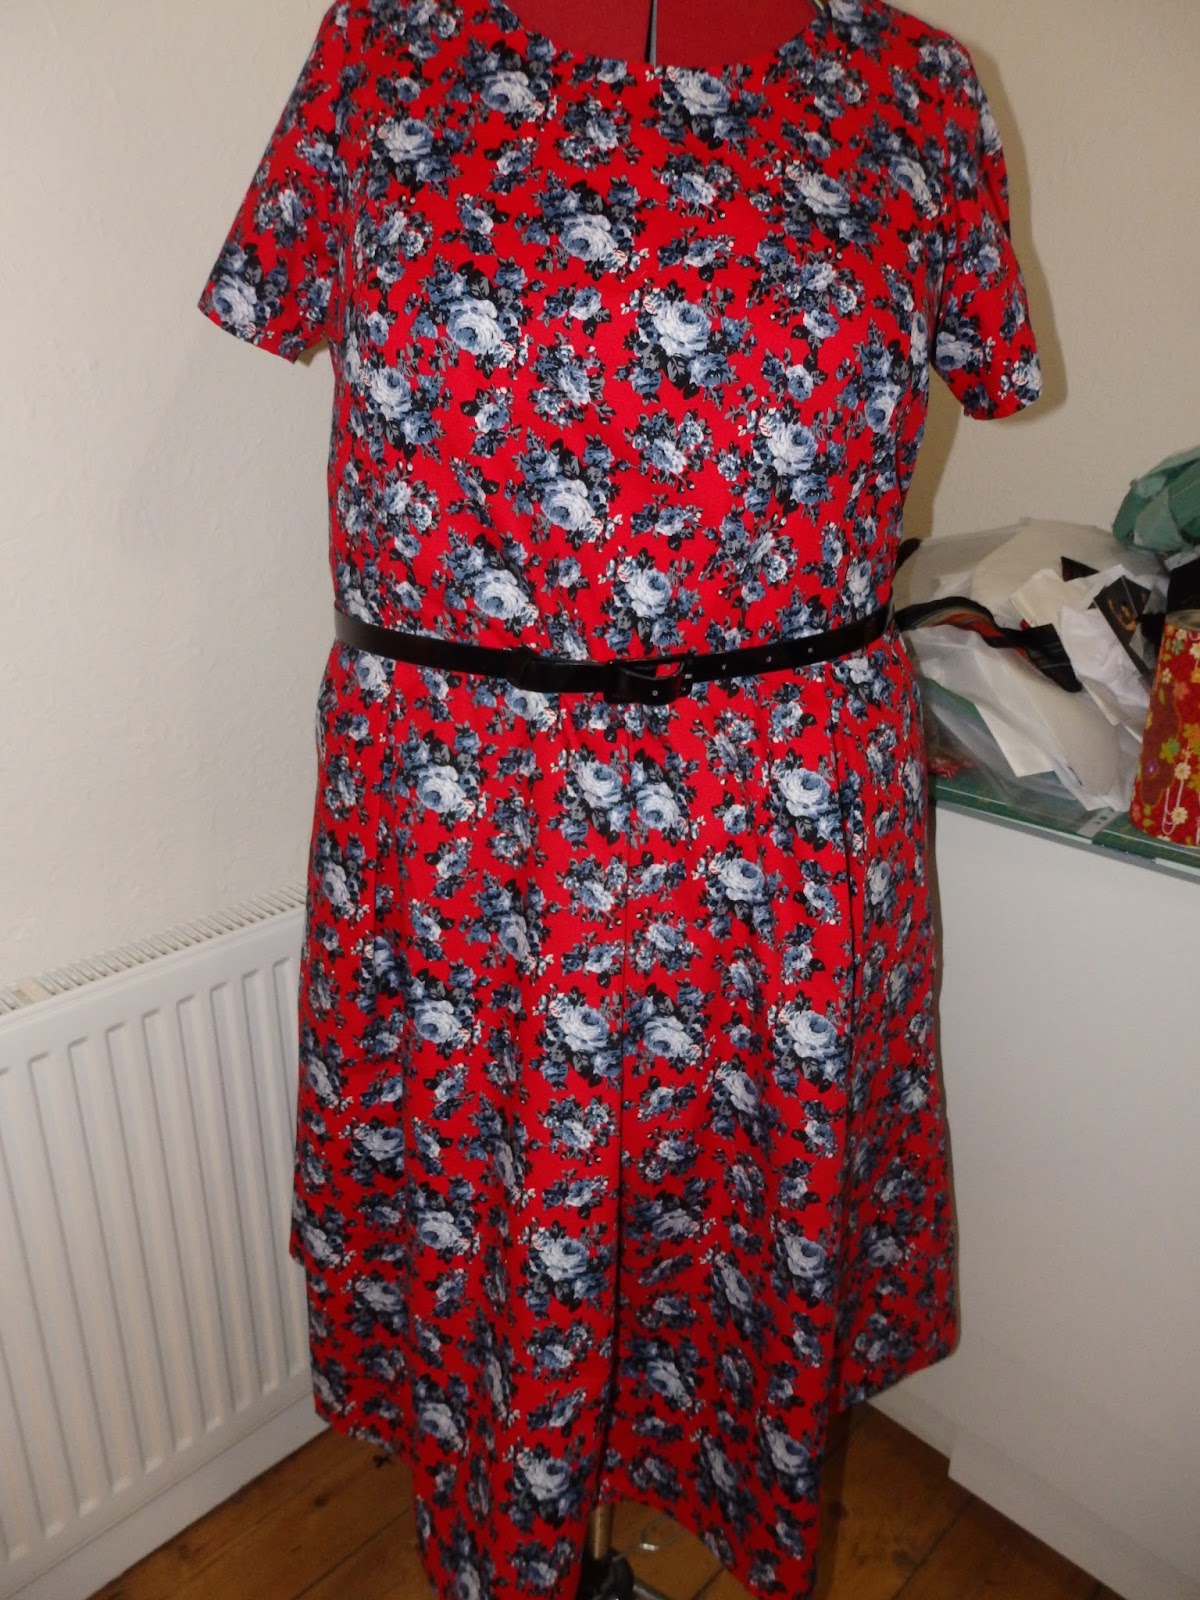
Red dress - The Tunic Bible

I am feeling the pressure now, I have to complete my red dress for the Red Dress Challenge, but this challenge is double edged, these are the Christmas dresses we will wear on the final day of work for this year.

A few years ago  Ronda and I made up our own challenge - Christmas dresses for the last day of work.

To add to this we both decided that we would also complete the Red Dress Challenge.  No problems, right?  I love red.  Shouldn't be a problem...I stand corrected.  I have lots of after five fabric in red, but, only one piece that Ronda had given me for either a Christmas or a birthday a few years back.  Since I did not want to go out a buy fabric, this had to be what I used up.

The pattern I liked from The Tunic Bible.  In the book it is made out of a knit fabric.  I chose it because I liked the sleeves and had not made a dress with sleeves like this before.


It is a good pattern, for someone that is experienced in sewing and pattern alterations.  I need to clarify, I am very happy with the final outfit.

However, there is an adjustment on the front neckline for the scooped neckline, however, this does not correspond with the back neckline (it had to be lowered).  Also, because I chose to use a woven fabric, and not a knit I also had to create a front neckline facing.  To cater to my measurements, there was only one adjustment I needed to make, that was to lengthen the bodice at the waistline by 1" (2.5 cm).


The fabric I had was a very light voile, so sheer in parts that I have my husband worried that I might leave the house with just this on.  Not so, I will be wearing the voile slip I made in my last blog post underneath!

Here's a photo with the two of us:


Friday, 16 December 2016

Lingerie Design - Full slip

In my next post, I'II be revealing my red dress, for the little red dress challenge.  Trouble is, it is made from a fabric that has see through bits.  I don't think my husband will let me leave the house until it is less see through!!

I contemplated lining it, threw out that idea and decided to make a slip instead.

Trouble is, I am not in the mood to draft the pattern, I just wanted to get it done and move on with other sewing.

I decided I would use the same pattern that I used in my red dress, but alter it using some basic drafting techniques and apply it to this alteration.

I am pleased with the outcome:


It fits quite well on me, appears wonky on my dressmaking dummy because my room is a mess, and,  my dress is no longer see through!

Tell me, do you want me to post a tutorial on how to do this?  It really was very simple to do.

Well, I'm determined to make it to my blog goal of 52 blog posts for 2016.  I can see that I am fairly close to this now, so, I will work hard to attain it.

Any suggestions as to what you'd like to see on this blog in 2017?

Merry Christmas everyone.

Sandra

Sunday, 6 November 2016

Wonky star patchwork

It's been a busy time.  Finally, I'm seeing some relief in sight, and after weeks of not even remotely touching my sewing machine, and hurting my back; finally my machine and I are reunited.

Three fabrics sitting in a bag for weeks, with an intended recipient ... a deadline is drawing near.


I like this design, I have used it before.  What I like about it is that it doesn't really matter where you place the fabric for the triangles, so no stress in matching up the blocks.

I used this design previously to make a cushion cover:


I need to finish the piecing for the quilt as it has to go to Ronda to be quilted when I'm done.

Looking forward to seeing it when it's completely done.

Happy sewing everyone.. yes, I'm still here!

Sandra

Tuesday, 11 October 2016

Keep yourself decent....


My experience with wrap around dresses is that they fly open in the wind.  Not good, they always fly open at the wrong moment. You may recall I made two of these dresses from Ottobre Design in a previous post, I also needed to make one because my Japanese voile dress was quite see through:


Also, in a recent post I made my go to pattern Simplicity 2371, which also was made of voile, so a half slip was necessary.

I had purchased some stretch silk some time ago for this very purpose from Rathdowne Fabrics. 

Making a half slip is very easy, and no pattern is required.  I have purposely made this slip to sit around 5 cm (2") above my knee.  I don't usually wear my dresses or skirts above my knees, so this suits me.

To make this half slip, I did the following:

1     I measured my hip measurement and added 3 cm ease plus 2 cm seam allowance
2     I decided what my length should be and added 5 cm to this length (2.5 cm for the hem and 2.5            cm for casing for elastic (just remember that the finished length needs to be shorter than your              finished dress)
3     I used the french seam technique to finish the side seams

       (a)   Place right sides of the fabric together (at the seam)
       (b)   Sew a 2/8" seam, trim to 1/8"
       (c)   Press seam
       (d)   Fold the fabric (right sides together)
       (e)   Sew a 3/8" seam
       (f)   Press
5     On the top end, turn over and press 2.5 cm, sew into place and leave an opening to insert elastic,          secure elastic and sew up the opening
6     Turn in side seams and hem and sew around this edge
7     Attach lace (since my fabric was a stretch silk I used a stretch lace) around the hem of the slip.

If my instructions don't make sense to you, here's a visual one from Craftsy.

Had I made the slip at a length below my knee I would have had to leave the side seam open at either one or both side seams.  This opening would give you room to move freely.

Happy sewing everyone.

Sandra


Tuesday, 27 September 2016

My go to pattern .... Simplicity2371

I've come to the conclusion that I do have a go to sewing pattern, It's Simplicity 2371. Why? I like wearing the dress with or without the tie around the waist.  It's comfortable on a hot summers day and, it is easy to make.

Whilst ploughing through the bargain table at Spotlight I came across this cotton voile:


I loved the colours and pattern on it, but, there was so little on the bolt that I hoped that I could make a dress out of it.

I laid the pattern out and found that I had just enough to make the dress (or tunic as it's referred to on the pattern). Phew, at least I got that much out of it.


The only alteration I made to this top is to raise the slit in the front by 2.5 cm (1").


Added bonus, the bird in the pattern is centered in the front (I'd like to say that I planned it that way, but, I'd be lying).

Happy sewing everyone.

Sandra

Saturday, 3 September 2016

Baby quilt

This is the same patchwork pattern that I used in my Three Shirt Quilt:


It looks slightly different because I had to make do after I ran out of the purple fabric.  So I added sashing to the outer borders.  This time I used the Madeira Aeroquilt 3000 thread that I picked up at the last quilt show.

Now you know that quilting is something I am pushing myself to do as one of my challenges, but I must say that whilst using this thread I had a moment where I thought "I really enjoy doing this".  So I stitched in the ditch for most of this and then did this quilting pattern (didn't use the blue tailor's chalk this time to mark the pattern).

I used my regular sewing machine, not a long arm machine.  I think having the right equipment to do a job is very important.  Earlier this year I purchased a Horn Sewing/quilting table and it was the second time I'd used the quilting extension to the table.  Conclusion, it helps to keep the quilt flat and not running off the table.

Here's a close up of the quilting (the quilt has been washed, so that's why it's looking a bit crinkled):


I think I have a home for it to go to now.

What have you been up to?  I have another quilt of this design almost done and it seems that the baby making phase at work has started up again, so Ronda and I are busy again making baby quilts and one retirement quilt.

The weather is still coolish here, but, we are seeing the sun a bit more often, my October Design magazine has just arrived and it's time to investigate my stash to pull out some summer fabrics to make outfits from.

I have so many projects in mind that going to work is just an inconvenience (but funds the fabric addiction!)

I hope all is well in your world.

Happy sewing.

Sandra

Saturday, 13 August 2016

A-line skirt.

I'm still on my self drafted pattern quest.

In a previous post French cuffs I had self drafted this pattern with long sleeves and french cuffs, since I like to make a pattern more than once (because of the amount of time it takes to draft and get to the final stage).

This time I made it with short sleeves, why?  Hmm, didn't have enough of this fabric to make it up as a long sleeve shirt. I also decided that I wanted to use lots of mother of pearl buttons that I had purchased online:


The skirt is an A Line pattern I made up from a wool/polyester fabric I had purchased for $7 a meter.

In hindsight, I should have cut this skirt on the bias to make the check more interesting.

The skirt is fully lined.

I know it is summery looking, but the skirt is quite a winter weight.  However, it suits me because I often find when indoors during winter that it gets too hot.

Working on a quilt or two right now as gifts, so maybe my next post will be about this.  Or maybe the new Ottobre magazine would have arrived by then!

Happy sewing everyone.

Sandra


Saturday, 6 August 2016

Japanese Obi

Recently l was given this Japanese Obi and fabric.
I don't know whether l can bear to cut the Obi up.  I guess if l don't, it'll just be placed in a cupboard, and if l cut it up, then l feel that l've cut up a piece of history.

What to do?  I really don't know.


I think l'm going to send it to the dry cleaners and decide on it's outcome after it comes back.

Have you any suggestions to give me?

Happy sewing everyone.

Sandra

Thursday, 14 July 2016

Stretch fabric cardigan

My overlocker and I are spending some quality time with each other lately.

I've been sorting through my ever expanding stash.  Sadly some fabrics have moved onto other homes, others are with me.  I am trying really hard not to add to my stash at the moment.

Whilst sorting I came across a boucle orange fabric, just one meter, 150 cm wide, would there be enough to make a cardigan?  With much fiddling - yes.  Luckily it is a busy fabric, because the bottom band is piece, upon piece of fabric sewn together.


The pattern used was Seamworks, Wembly Cardigan 3024.

https://www.seamwork.com/

An hour and a half sewing time! May have taken less time had I been able to see the eye of the needle to rethread the overlocker, and had a needle not drop out of the machine!

Such a fantastic, quick project, done entirely on the overlocker (serger), would highly recommend this. The fit on this companies patterns are true.

Happy sewing everyone

Sandra

I did make another cardigan in black to go with my Ottobre dress.


Friday, 1 July 2016

An important lesson, in sewing.

So, or sew. I tried the Fast and Fun Downloadable patterns - Hoodie Jacket.  It is an easy to follow and construct pattern.

I must admit, I had reservations before making this top because of the winged panels.  Reservations, because I am plus sized and prefer more fitted garments.

This is my final top:


Hang on you say, this has 'no wings'!  You know those reservations I had about the pattern, well I should have followed my gut feeling!  This is not a criticism of the pattern, in fact, the pattern has easy to follow instructions and is easy to sew, I enjoyed sewing it, it was just a poor choice of pattern for my figure type.

So, this is how the pattern should look:


It was all coming together nicely when, at 2 am (I was having a nice time sewing, a real luxury when you are on holidays), I thought I should have a look at what it looks like on me and on my dressmaking dummy:


No, no, no, I am not pregnant and do not want to encourage this look on me.  So, at 2 am I thought I better go to bed, because I knew that  to take the panel out and finish the top would take me equally an amount of time to fix as it would have taken me to sew.

The next morning I removed the side winged panels with the pocket and straightened out the back panel to match the front.

Would I make this pattern again in it's original format?  No, it's not for me.  I would however, consider doing it again in the modified form.  I would add pockets and fully line the hoody.

If you are thin, I would recommend this pattern, but, it's not for me.

I learnt two important lessons, I should just go back to pattern drafting, the work involved with adjusting a purchased pattern is not worth the time and, more importantly, don't stray from your own style.

Happy sewing everyone.

Sandra

Wednesday, 15 June 2016

Butterfly quilt - Celebrate the little things

This is our entry into the Minda Benefit Challenge Quilt as a part of the Australian Machine Quilting Festival.  I designed the butterfly block, and my friend Ronda - Anakie Quilter, did the machine quilting. I call it, "Celebrate the little things".


The theme of this years challenge is "Celebration".  A condition of entry is to use 6 fat 16'ths of fabric  (Colour Movement fabric range by Kona Bay) supplied in the quilt and it must measure a maximum of 100 cm on each side.

All entries must be original, well, I sweated on that idea for a while.

This quilt won't be coming home, all quilts entered will be donated to Minda Inc to be auctioned will full proceeds used to assist in supporting people living with an intellectual disability.

Butterfly design by Sandra D Copyright 2016

Butterfly design by Sandra D Copyright 2016

Butterfly quilting by Ronda - Anakie Quilter

Butterfly quilting by Ronda - Anakie Quilter


Back of quilt (you can see quilting more clearly)
I called this quilt "Celebrate the little things".

And my story of Celebration to accompany the quilt:

"From an ugly cocoon to a colourful, beautiful butterfly, as a child I was intrigued by the metamorphosis of a caterpillar into a beautiful butterfly.

A butterfly only lives for a short time.  To me, represents the small wonders of our world and new beginnings.  A butterfly, with its delicate wings and wonderful colours reminds me that we should take the time to celebrate the smallest things that give us joy and appreciate all that exists around us.

A butterfly is beautiful, and free."

So, it's packed and ready to be sent.

What have you been sewing?  Next to sew another outfit...a week and a half until holidays, the sewing machine awaits!

Happy sewing.

Sandra


Monday, 30 May 2016

Ottobre Design Woman Spring/Summer 2/2015


I got bored with trying to make little things to create a blog post every week.  It's fun to do little things, but, it lacked a challenge.  Working full time, with an hour each way travel to and from work, I do find it hard to complete a dress a week.

Ah, the good old days, living at home and sewing my going out dress for Saturday night and finishing just as I was about to leave the house on Saturday night.

Some time ago I made adjustments to this pattern to cater to my figure.  It appears, with age, my midriff has expanded, so, my measurements are the same for my bust and my waist. The other thing I added was a short sleeve.

I wanted a dress that was light, but one that would also keep me warm during winter.  Hence the reason I opted to stay with a fully lined dress.  I paired it with a belt that helps to create an elusion of some form of a waist.

Our winter days can often start off cold and gradually warm up to a point that it feels like you are doing a strip tease throughout the course of the day.

I am happy with the fit.  Perfect on the shoulders and very comfortable to wear.  It's red, it's bright, makes me feel good on a drab winters' day.  Especially in Melbourne when Winter is just a code word for wearing black!

Are you like me and calculated that there are seven months until Christmas?  Did you realise you'd have to start making your Christmas gifts very soon?  I did.

Happy sewing everyone.

Sandra


Akita - Seamworks

Seamworks patterns are designed to be made in about three hours and use simple finishing techniques - good for when you just want to quickly add something new to your wardrobe.


Front and back of this top are cut in one piece, two seams to sew and four yards of bias binding, and there you have it, a new top.

I am pleased with the fit and sizing of this pattern, I would recommend someone trying Seamworks patterns, the sizing is real, rather than fashion industry driven.

Plus I used a fabric that had been sitting in my stash from the 1980s, I bought this on the day that I decided in my sewing life, that you should always spend money on good quality fabric.  Bonus also I had the perfectly coloured vintage bias binding to match the top!


Happy sewing everyone.

Sandra

Friday, 22 April 2016

Sewing mishaps and the AQC (Australian Quilt Convention)

I will start with my sewing mishap this week.  I wasn't going to blog about it at all. 

I decided I would because not all sewing adventures can be a success.  We come up with a bright idea, and then, nah, didn't work out.

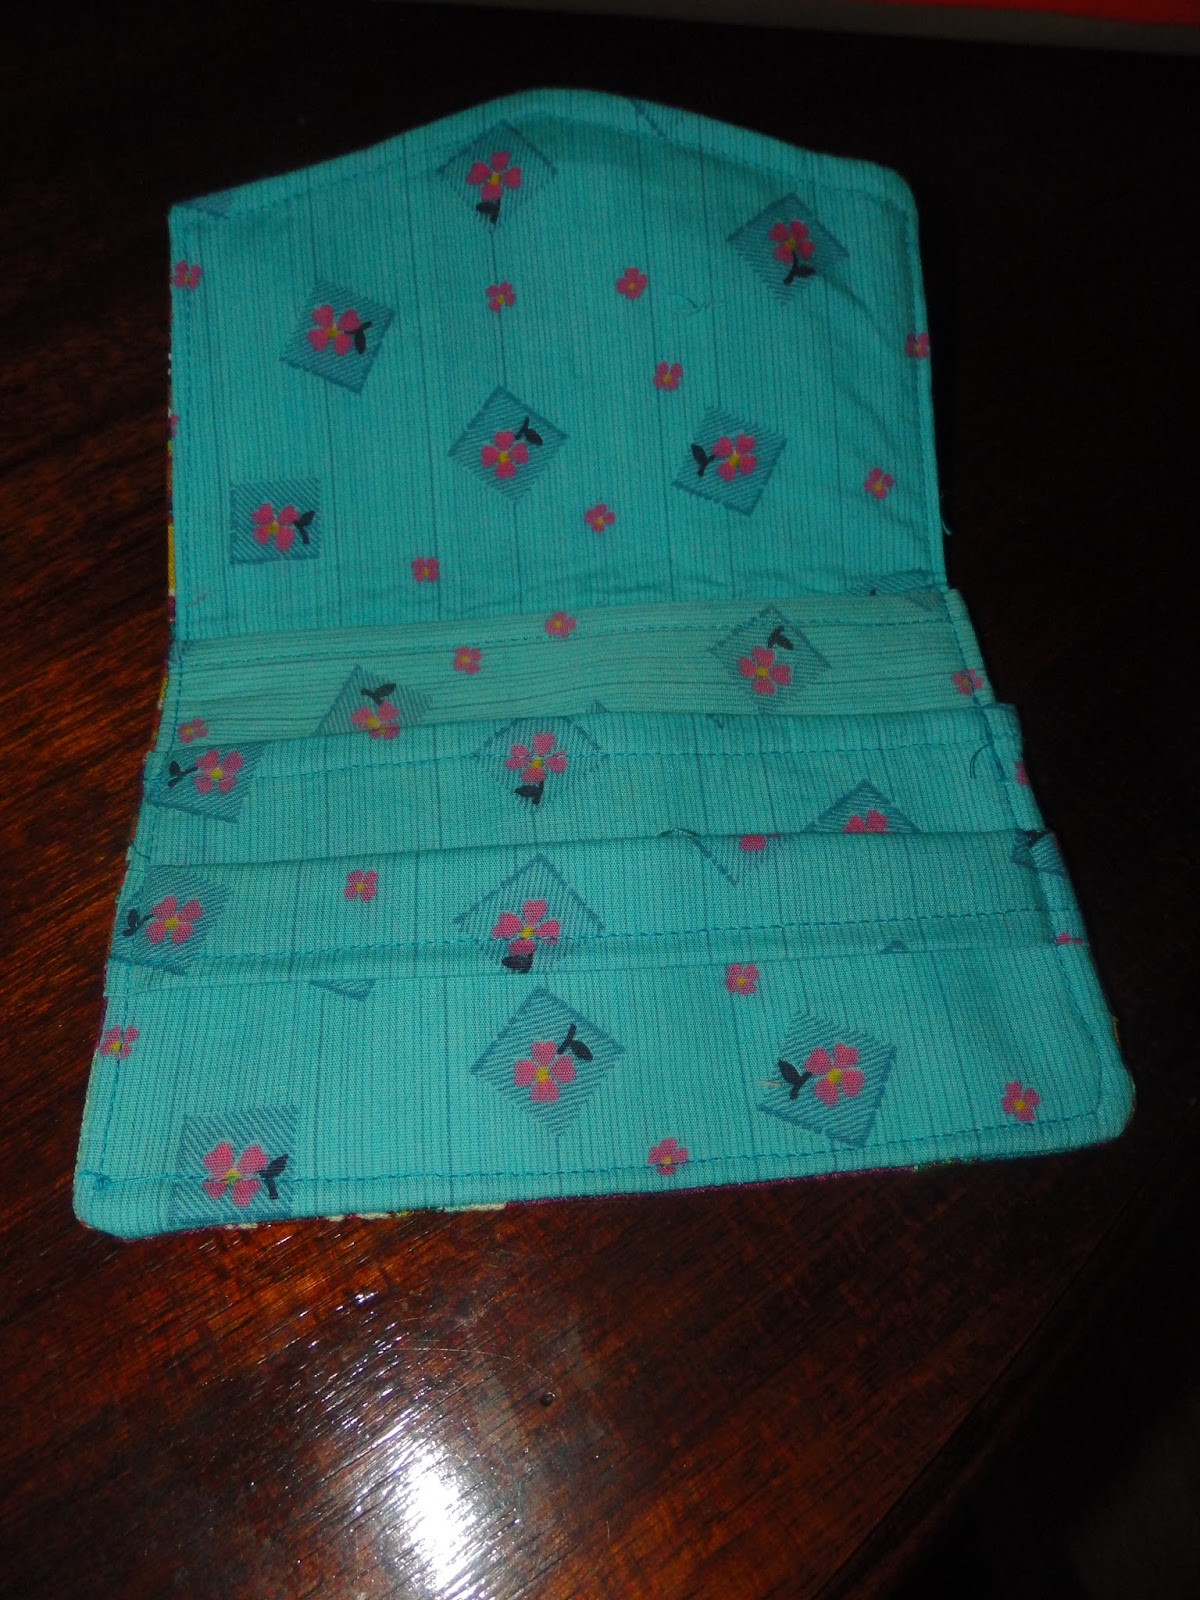
I wanted to try the Receipt Holder Tutorial by Lisa Amundson available for free on Craftsy
 So here it is:


What I think were my mistakes are:

  • the interfacing I used was too thick for the job
  • I didn't line up the flap closure evenly
  • my top stitching is questionable
Maybe I should try making it again, don't know.  I have a policy of making something again when I've had problems with the design or sewing.  I think I'II have to follow my own advice.


Yearly the Australian Quilt Convention (AQC) hits Melbourne at the Melbourne Exhibition Buildings.

I ummed and ahhhed about going this year.  You know how it is, if I go, I'II buy more fabric and stuff I really don't need.  Even on the Saturday I still toyed with the idea.  In the end I decided I would go on the Sunday.

My main motivation behind finally deciding to go was that I wanted to visit the Sizzix stand run by Annie's Designs (www.anniesdesigns.com.au).  I'd exhausted the range held at Spotlight and I had questions that no Spotlight or Lincraft staff could answer (don't worry I'd tried, I'm over the blank looks and wrong information).

While searching online I was alerted to the fact that the Sizzix machine was the only one on the market that would accept dies from other machines.  However, I didn't want to try it, until I could confirm it.  Also, I really didn't know what my machine was capable of and the types of dies that would go through the machine. The only way I would be able to get this information was to talk to a Sizzix expert.  So off to the show I went.

The fabulous thing is, after talking to Annie's Designs, that my Fabi Sizzix machine can not only cut through eight layers of fabric, it can with some extras cut paper and balsa wood without blunting the blades!  I also discovered a wonderful wide range of dies that go through my machine.  Annie's Designs were so helpful, if you're in Australia and use Sizzix machines, get online and look at Annie's site.

That's what I've been up to (besides work), what have you been up to?

Sandra

Sunday, 6 March 2016

Patchwork bag.


One post a week is my personal challenge. Almost didn't think l would make it this week!

What prompted my latest creation was the need for a birthday present. I've had many good ideas along the way, and many good suggestions by others.

What caught my eye on Pinterest was a bag.

I went to this site:  https://www.pinterest.com/source/patchworkycia.blogspot.com.es/   Found photos and no instructions.  I tell a lie, I found instructions, but in Spanish.  Using Google translate wasn't exactly helpful.

I also found this same bag at:  http://www.handmadiya.com/2014/06/blog-post_5.html?m=1.  Again Google translate let me down.

So, between these two sites and one other I was able to construct a bag.  I guess what prompted me to finally decide on this bag style was the fabric.  The fabric inspired me to begin this bag.  Japanese fat quarters I'd had in my stash that I'd forgotten I had.

Here is the bag, without the handles.  I almost ditched the handles, they had to be hand sewn on:

Here's the bag before it's had lining and formed into a bag, I used my Sizzix machine to cat squares of 4 1/2":


I like this bag, too bad I don't have any of this fabric left.  I am pressed for time, so this bag can't be mine, it is going to a good home.

Where are your sewing adventures taking you?

Happy sewing everyone.

Sandra