Showing posts with label #patterndrafting. Show all posts

Tuesday, 11 October 2016

Keep yourself decent....


My experience with wrap around dresses is that they fly open in the wind.  Not good, they always fly open at the wrong moment. You may recall I made two of these dresses from Ottobre Design in a previous post, I also needed to make one because my Japanese voile dress was quite see through:


Also, in a recent post I made my go to pattern Simplicity 2371, which also was made of voile, so a half slip was necessary.

I had purchased some stretch silk some time ago for this very purpose from Rathdowne Fabrics. 

Making a half slip is very easy, and no pattern is required.  I have purposely made this slip to sit around 5 cm (2") above my knee.  I don't usually wear my dresses or skirts above my knees, so this suits me.

To make this half slip, I did the following:

1     I measured my hip measurement and added 3 cm ease plus 2 cm seam allowance
2     I decided what my length should be and added 5 cm to this length (2.5 cm for the hem and 2.5            cm for casing for elastic (just remember that the finished length needs to be shorter than your              finished dress)
3     I used the french seam technique to finish the side seams

       (a)   Place right sides of the fabric together (at the seam)
       (b)   Sew a 2/8" seam, trim to 1/8"
       (c)   Press seam
       (d)   Fold the fabric (right sides together)
       (e)   Sew a 3/8" seam
       (f)   Press
5     On the top end, turn over and press 2.5 cm, sew into place and leave an opening to insert elastic,          secure elastic and sew up the opening
6     Turn in side seams and hem and sew around this edge
7     Attach lace (since my fabric was a stretch silk I used a stretch lace) around the hem of the slip.

If my instructions don't make sense to you, here's a visual one from Craftsy.

Had I made the slip at a length below my knee I would have had to leave the side seam open at either one or both side seams.  This opening would give you room to move freely.

Happy sewing everyone.

Sandra


Saturday, 13 August 2016

A-line skirt.

I'm still on my self drafted pattern quest.

In a previous post French cuffs I had self drafted this pattern with long sleeves and french cuffs, since I like to make a pattern more than once (because of the amount of time it takes to draft and get to the final stage).

This time I made it with short sleeves, why?  Hmm, didn't have enough of this fabric to make it up as a long sleeve shirt. I also decided that I wanted to use lots of mother of pearl buttons that I had purchased online:


The skirt is an A Line pattern I made up from a wool/polyester fabric I had purchased for $7 a meter.

In hindsight, I should have cut this skirt on the bias to make the check more interesting.

The skirt is fully lined.

I know it is summery looking, but the skirt is quite a winter weight.  However, it suits me because I often find when indoors during winter that it gets too hot.

Working on a quilt or two right now as gifts, so maybe my next post will be about this.  Or maybe the new Ottobre magazine would have arrived by then!

Happy sewing everyone.

Sandra


Friday, 1 July 2016

An important lesson, in sewing.

So, or sew. I tried the Fast and Fun Downloadable patterns - Hoodie Jacket.  It is an easy to follow and construct pattern.

I must admit, I had reservations before making this top because of the winged panels.  Reservations, because I am plus sized and prefer more fitted garments.

This is my final top:


Hang on you say, this has 'no wings'!  You know those reservations I had about the pattern, well I should have followed my gut feeling!  This is not a criticism of the pattern, in fact, the pattern has easy to follow instructions and is easy to sew, I enjoyed sewing it, it was just a poor choice of pattern for my figure type.

So, this is how the pattern should look:


It was all coming together nicely when, at 2 am (I was having a nice time sewing, a real luxury when you are on holidays), I thought I should have a look at what it looks like on me and on my dressmaking dummy:


No, no, no, I am not pregnant and do not want to encourage this look on me.  So, at 2 am I thought I better go to bed, because I knew that  to take the panel out and finish the top would take me equally an amount of time to fix as it would have taken me to sew.

The next morning I removed the side winged panels with the pocket and straightened out the back panel to match the front.

Would I make this pattern again in it's original format?  No, it's not for me.  I would however, consider doing it again in the modified form.  I would add pockets and fully line the hoody.

If you are thin, I would recommend this pattern, but, it's not for me.

I learnt two important lessons, I should just go back to pattern drafting, the work involved with adjusting a purchased pattern is not worth the time and, more importantly, don't stray from your own style.

Happy sewing everyone.

Sandra

Tuesday, 5 April 2016

UFO - 2


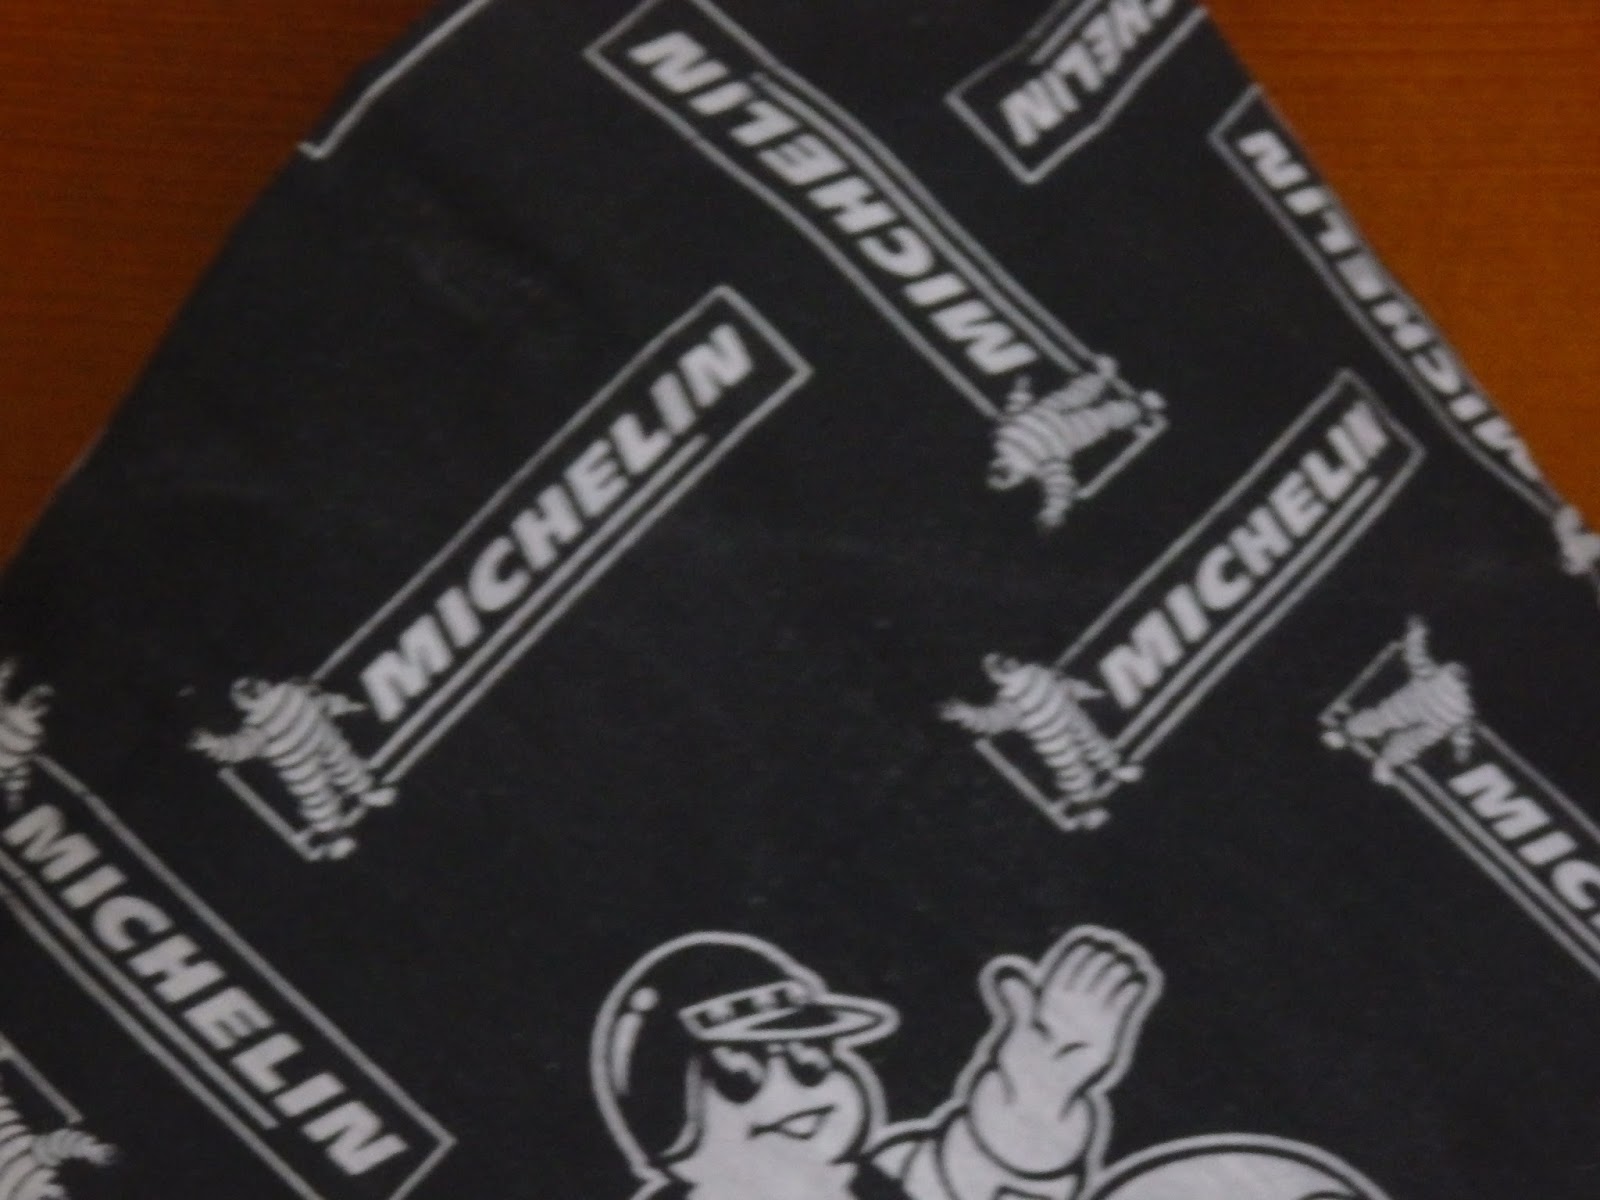
I am after, and have been for a while, Michelin Man fabric.

Does it exist? I have searched for a while (and I stand to be corrected, if I am wrong); however, I don't think it exists.

I wanted to make a queen sized quilt, at least that was my aim.  The closest I could get was a Michelin Man bandana.  I found two on ebay (I've been searching for quite some time). One blue, one black; and that's it.  I initially got excited because I thought that I could collect a few of these and make my quilt.

One bandana on it's own, does not make a quilt, not one that was envisaged in my head.

So in my organising and reorganising of my fabric stash we found each other again, and this time, instead of putting it away, I made it into a pillow case; some collectors have probably fallen over in horror; but things like this need to be used and not collect dust.

It's a part of my new mantra, why store it for someone else to enjoy when you pass on?

So here it is, a Michelin Man pillow case:


I hope it will be appreciated.

Happy sewing everyone.

Sandra

Sunday, 4 October 2015

A scathingly brilliant idea .... we thought! Ottobre 2/2006 Design 1 T shirt

Yes, I know, I've gone missing for a while and could well disappear for a little while more after writing this, we're renovating, we're near the end; but, you know how it is, just as we seem to get some momentum, something slows us down.  All this means for me is that my sewing machine and I have very little time together.

My friend Ronda and I came up with this "scathingly brilliant idea" (as Hayley Mills once said in 'The trouble with angels'.

We decided to buy these Tshirts online and would wear them every Friday!  (Sometimes the journey is more fun than the destination).

Check, yes, choose our colours:  Ronda - blue (there was no purple option) and me - red.

Yes, yes, sizing, checked that.

Ok order.

For two weeks we waited for them to arrive, excitement.  Here is what we received:


All appears well, doesn't it?  Except that there is no ease in the measurements, so either fit too tightly or not at all.

Major disappointment on my part.  I was so looking forward to our Friday attire.

Some weeks passed....my tshirt lived on the back of my chair at work.

Ronda then suggested that we transform our tshirts.  OK, Sandra getting excited again. We searched on Pinterest for ideas to inspire us.

Then finally the big day came where we would transform them. (Still feeling excited and inspired).

We cut.


We even had, Boss the cat drop by to inspect whilst we were working.  I think he gave them the paw of approval and then moved on.


Both Ronda and I used Ottobre 2/2006 Design 1 Tshirt when adding to our Tshirts (great easy to use pattern).

I used a lovely stretch lace to add to my Tshirt.


Mm... verdict?

As my husband said, it looks like you've got an apron over a nice lace top!  Seems fitting since I'm forever dropping food on my tops!

Ronda and I had an enjoyable afternoon filled with much laughter, our scathingly brilliant idea lead us to this point.

I'm sure we'll get some side way looks this week at work when we wear our creations, Ah, big deal, the point here is, that there is more to life than work and work is a means to allow you to do all those things you enjoy.

Until next time (who knows how long that will be), happy sewing.

Take care
Sandra

PS, if you've got some suggestions to make this Tshirt more wearable, or should I say fashionable, I'd be open to your suggestions!

Tuesday, 30 June 2015

The value of handmade gifts. My thoughts for today.

I like to give a hand made gift.  I also like to receive them.

Do all people appreciate a hand made gift?  I hate to say it, I don't think so.

I know when I have made a gift or have received a gift that is handmade, that a lot of time and effort has gone into that gift.

It starts with the thought process. That person has taken the time to think of you and then think of a gift that would suit who you are.  The colours, the tones, there is pleasure in the thoughts of creation.

The maker then takes the time to shop for the materials to create that gift and purchase it.

The maker then takes hours, if not days, weeks or months to create that gift.  This is time out of their day that they have spent on your gift rather than socialising or doing something else important to them.

So imagine the disappointment when comments come your way that a handmade gift is a cheap option?  Guess what, no more handmade gifts for you, it is cheaper to purchase one, you know, the one made in China.

(PS I have not had these comments lately, this is an old gripe, I just limit who I make handmade items)

Just food for thought.  I think it's important to be selective with whom you sew gifts for.  That's been my lesson in life.

Happy sewing.

Sandra


Thursday, 25 June 2015

What fabric do you find scary?


Well, after tonight, it's one more sleep until we get a two week term break.

My thoughts immediately turn to the next sewing project (actually, my thoughts are never too far away from sewing).

Today I got thinking, "what fabrics do people find scary?"

My favourite fabric and fabrics of choice are usually natural fibres:  cottons, silks (dupion in particular) and wool. I love the way they feel, cut and sew.  I do love velvet as well, all my bridesmaid dresses were made in a red velvet.

After that I don't mind mixed fibre fabrics.

I am not a purist when it comes to patchwork and will make quilts using polycottons (I hear you gasp).

Of late, I have taken a journey into stretch fabrics.  I admit, I don't have a love of this fabric, however, as I use it more and more I have begun to understand how to manipulate it more effectively.

Even velvet doesn't put me off, a good velvet mat and a teflon foot and off you go.

I'd never really found a particular fabric scary.  I usually take on a fabric and don't think about it. Until one day, one fabric totally defeated me.

Silk chiffon, it was like trying to tame a tiger.  I still don't think I'm over the whole experience.

Image result for taming a tiger

If you laid it out one way, it went another.  If I cut it straight, it seemed to be off.  I don't like that feeling of defeat, so next time I will wash it first and starch it, dry it and try cutting it.  Of late I've taken to washing fabrics that shouldn't be placed in a washing machine, so why not try it on this one. I will try to tackle it again.  Even if you do scare me Silk Chiffon, you will not win!

So, what fabric do you find scary?

Sandra


Monday, 25 May 2015

Sherri. Ottobre Design Woman. Autumn/Winter 2010 Style 15

This project would have been finished sooner, had work and renovating not got in the way!  That's just the way it is at the moment. I guess it's not about the race to finish clothing; but, the journey to the end.

As I've expressed in the past, my need is to improve my winter wardrobe. 

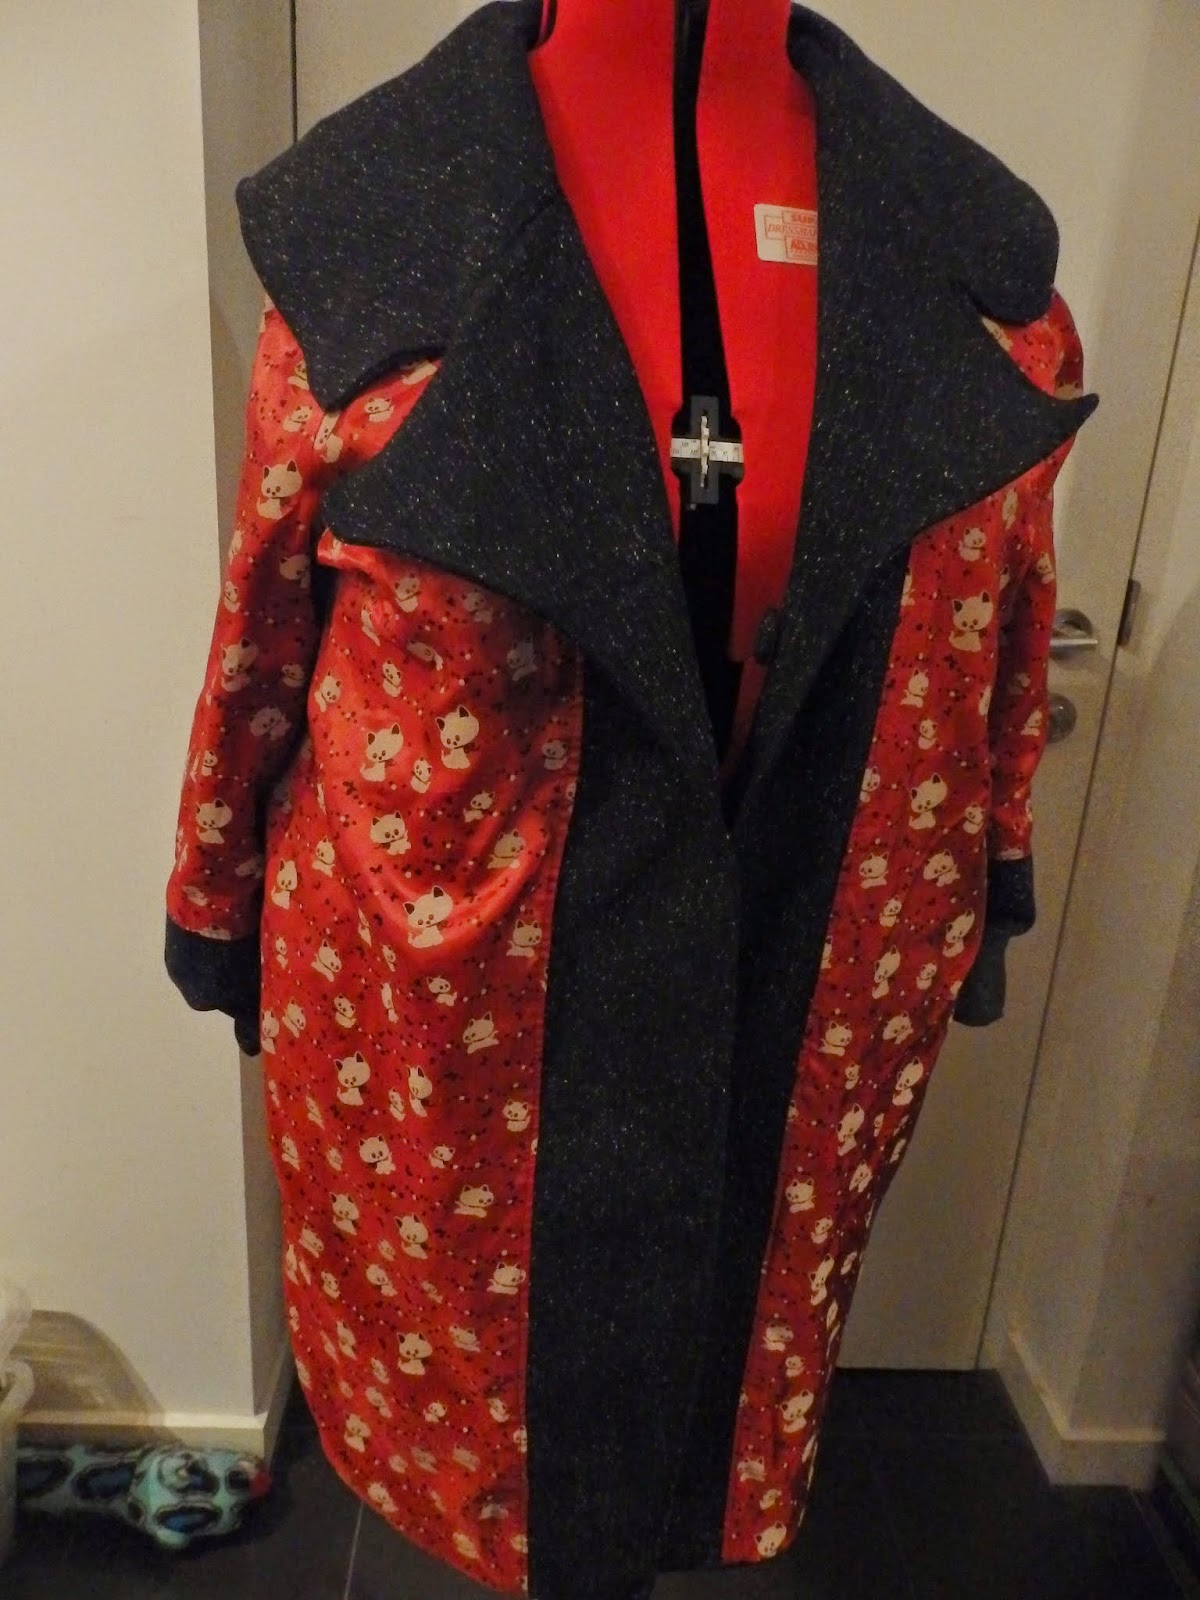
I liked the coat, Sherri, Style 15 in Ottobre Design Woman. Autumn/Winter 2010.

I sat on it a while before following through wondering how it would look on me. Finally, I cut it from a black wool fabric with white specks through it.


My lining is a cat motif fabric that I purchased from the Alannah Hill outlet shop in Fitzroy, Melbourne, Australia. (Secretly, I want to purchase a whole roll of this, but lack of space at the moment prevents me from doing so.) Aren't the cats cute?


I love the cat motif fabric so much, I almost think that this should be the outer layer and not the inner one - but then, I could rightfully be accused of being a 'mad cat lady' (but we don't have any real cats at the moment in our household).  I like the lining on a jacket or coat to express a playfulness, be it a burst of colour or a fun motif.  There is nothing better than the compliment or smile that lining brings to someone else.


It kind of works with the lining as the outer layer, don't worry, this is the coat inside out!

What I loved about this pattern was the ease at which it comes together. I have sewed for a very long time and never tried to do an encased lining.  Love it, love it, love it  -  no hand sewing!

So here it is the right way around:


Ottobre, you've done it again, I love the fit for a larger woman.

Happy sewing everyone.

Sandra

Sunday, 26 April 2015

Ottobre Design Woman Autumn/Winter 5/2013 Style 3

I've made this top before, out of a linen.  It wasn't a recommended fabric, but I did it anyway.

After an opportunity shop adventure with my friend Joanne, I found a lovely red viscose fabric that I thought would be ideal for this pattern.  Now, don't turn up your nose at venturing into an opportunity shop (second hand store). I used to, I no longer do.

You see, I discovered that, like me, many people would donate good quality 'stuff' to charities. I know when mum and dad died and we were clearing the house for sale, that we knew we couldn't keep everything and donated a lot of good quality gear to them. So, if we donate quality 'stuff', then other people do as well. Plus, these places exist to sell second hand items and use the money to help people less fortunate.

What I tend to find is, that most family members, when they see that their loved one has passed on, will quickly dismiss sewing gear, fabric and patterns and either throw them out or give them to a second hand store.

So, here are the photos of the Leo Bohemian blouse in linen:


Here it is out of this red printed viscose:


Conclusion? It works better in the recommended fabric.

We live and learn.

Happy sewing everyone.

Sandra

Sunday, 12 April 2015

Irish Chain quilt

I have ventured back to quilting to make a special boy a quilt for his birthday.  I hope that he likes it.


I began learning to quilt on this design, and haven't made it for a while, so it was a treat to make it again.

Happy sewing everyone.

Sandra

Wednesday, 8 April 2015

Simplicity 2371

Excuse the fact that I didn't iron the dress before I took a photo.  Just was too eager to capture me.

This Simplicity pattern, is simple, but effective and comfortable to wear.

The fabric is a cotton print purchased from Spotlight.  It is a copy of an aboriginal print.

It looks like I purposely put the stripe of blue to one side.  However, truth be told, the fabric was narrow so, there was no room for error, nor any room to fussy cut the design.  So, I had to let it all just happen, and to my surprise it all matched up in the end.


I have found that sometimes it's best not to over think something and just go with the flow.

Happy sewing everyone.

Sandra

Saturday, 21 March 2015

Ottobre Autumn/Winter 2013. Style 4 Raglan Sleeve Friday Evening

I'm not a big fan of stretch fabric. I find it a bit uncontrollable when cutting.

However, I am very pleased with this dress. With only three pieces to cut to put together and a fabric I bought at a sale at Rathdowne Remnants, this dress cost me $14.50. As I said I am pleased with the result. Fit is good to.  The only adjustment I made to the pattern was to add length in the bodice to suit my measurements.

So, here it is:


Happy sewing everyone.

Sandra

Thursday, 26 February 2015

mm...fabric cake

Yesterday was my birthday.

l just wanted to share with you a fabric gift l received today from my friend Ronda.

A cake made of fabric, what a delight for any sewing enthusiast.

No calories, no worrying about increased sugar levels...just pure delight!

Thanks Ronda.


Happy sewing everyone.

Monday, 23 February 2015

Ottobre Spring/Summer 2/2014

I guess you can always notice when I've gone back to work, my posts are less frequent.  Well, one has to work to fund my sewing habit!

A colleague at work gave me a piece of poly cotton fabric that she purchased from India. At first I thought it may become a skirt; but, I just wasn't feeling it.

I'd been wanting to make Style 15 from Ottobre Spring/Summer 2/2014 (in the magazine it is made out of linen):


Here it is made out of the gifted fabric:


Like everything I like about Ottobre, it comes together easily and fits well. Only thing is, I think I need to make a pair of pants to go under it!

Happy sewing everyone.

Sandra

Wednesday, 21 January 2015

Ottobre...I love you

Over a year ago I was introduced to the magazine Ottobre Design.  I love this magazine because I like the fit of the outfits once they are complete.

I now subscribe to this magazine, but lately I have been 'exploring' back issues.  I purchased Ottobre Design spring/summer 2/2007 as I liked design 10 Wraparound dress.  However, there are three things I didn't like about what was in the magazine (sorry Ottobre):  the fabric choice, the tie around the waistline and the sleeves:


I must apologise for the poor photo, I had to use my mobile phone and not my camera (I've misplaced the cord to the camera).

So I decided that there could be three possible changes that could be made to give this dress three possible looks.  For today I will show you two different changes I have made.

In my first dress made from a retro inspired print, I have shortened the sleeve (approximately 10 cms from the underarm and squared off) and kept the tie in the same fabric as the rest of the dress, yes it has the collar (but you can barely see it in the picture):


For the second dress (again in green) I did not put a collar on it and again used the shortened sleeve and ties in the same colour as the rest of the dress.  I used a beautiful Japanese cotton voile that I purchased on one of my fabric adventures:


I am happy with the results.  The third style I will make (when we near winter) is a long sleeve version, however the sleeves will be a straight sleeve version.

I've decided to make a half slip to go under these dresses (as wrap around dresses always seem to swing around open in the wind).  I will share that with you next time.

Happy sewing everyone.

Sandra

Saturday, 10 January 2015

Scraps, scraps ... and less scraps

When, a long time ago, I kept my sewing purely to dress making, I could easily get rid of small scraps of fabric.  That was such a long time ago.

Then, later, I also took up patchwork.  Now I can't get rid of the smallest of fabric - because it could be used in a quilt in some form of the other.

Lately, I've been cutting up those bits of fabric and cutting them up into 2", 3 1/2" and 5" squares and putting them aside to use in quilts.  I pinched this idea from the magazine "Quilt Your Stash" (great magazine).  This stash of bits and pieces was building up.  One of the things I'd like to work on in 2015 is reducing my fabric stash.  Making this ironing board cover  was an endeavour to work towards the reduction of fabric.

In my last post I had made a simple ironing board cover for my mini ironing board.  However, my regular sized ironing board was in need of some renovation.

Ah, my regular sized ironing board - my mother's from the 1950's, solid steel - hernia worthy.  I always made fun of this with mum, it's very heavy.  However, I long ago realised that when making evening dresses, that modern ironing boards did not meet the grade and tended to topple over with the weight.

When my wonderfully stylish mum (to the very end) passed away- here's a picture of mum in her hey day, I made the decision to hang onto the ironing board:


Ah, when I need to get it out I remember why I probably shouldn't have hung onto it.  We live in an apartment, so I have to continuously take it out and put it away; it's just one of those things that need to remain out all the time. Otherwise it's back breaking work.  So useful though for dressmaking, especially bulky items. So, it's here to stay.

I could have made my ironing board cover in an instant with one piece of fabric. No, I decided I would make it from my 3 1/2" scrap squares. Good thought when I began; "why did I do this?" thought whilst making it; "Great idea" I thought when I finished.  I'II never make one like this again. However, I feel it was worth doing for myself to have a cover with a difference.  I think us sewers are probably good at giving away our work, and sometimes not so good making household things for ourselves.

As I said the cover was made from 100% cotton scraps, so here it is:


The underside is an Ikea fabric, left over from curtains in one of our bedrooms:


All done now, am very happy with it.

Until next week, where I'II show you how one pattern can look so different with two different adjustments from my favourite magazine "Ottobre".  I didn't realise until I looked through my stash how much green fabric I've actually purchased - and it's not even my favourite colour!

I digress, I'II save this for next week.

Happy sewing everyone.

Sandra

Thursday, 1 January 2015

Happy New Year

Happy New Year everyone!

I finished off 2014 making notebook covers as Christmas presents, here ar some others that were done:


For today, I needed to do some practical sewing.  You know, the everyday  stuff you put off, but, need to do.

So, I decided that my ironing board covers need replacing.  I thought I would start with my small ironing board first.  I just wanted this to be simple, but yet using a fabric that depicted one of the things I really loved.

I began by tracing the outline of the ironing board onto the wrong side of the fabric, then, added a 2.5cm (1") allowance around it and cut along this line:


Then I basted this on with a basting spray onto a batting and a backing fabric:


I decided that I would just quilt straight lines on this:


Cut around the edge (the top that is in the shape of the ironing board).


I then cut a 8 cm (3") wide strip the diameter of the ironing board cover.  Fold in half, press, and use the over locker to attach this to the top.  I then threaded elastic through the casing, tied it together. Placed it on the ironing board. 

There you are, my new ironing board cover...


Now to tackle the larger ironing board cover, decision, do I patchwork it or not?  Depends, do I spend my time doing this or sew a dress?

Onto my next task.  Have a great day everyone, I'm hiding from the heat today under the air conditioner.

Sandra